 |
 The Happy Daylily Blog - daylily pictures and thoughts from my garden
|
| June 29th, 2015 - postscript to rust thread |
It occured to me as I went back and read my rust posts, that I failed to mention one product that had listed under Code NC. While I haven't myself used Double Nickel 55, I have heard that other daylily growers have used it and claim it does have a beneficial effect.
Double Nickel 55 is a microbial disruptor and actually doesn't contain any nickel. It contains a beneficial bacterial which colonizes the plants roots and other surfaces, which helps prevent fungus and other bacteria from becoming established in the plant. Growers that use Double Nickel 55 report that it's not necessary to spray weekly throughout the growing season with only 1 to 3 applications per season providing good results.
I am considering purchasing Double Nickel 55 this fall to add to my spray program as it only adds about $.20 to the cost per gallon.
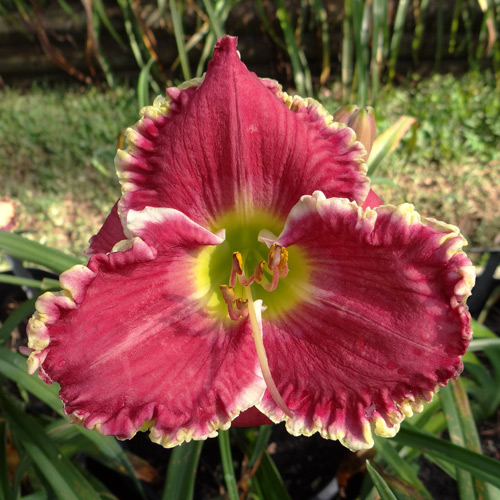
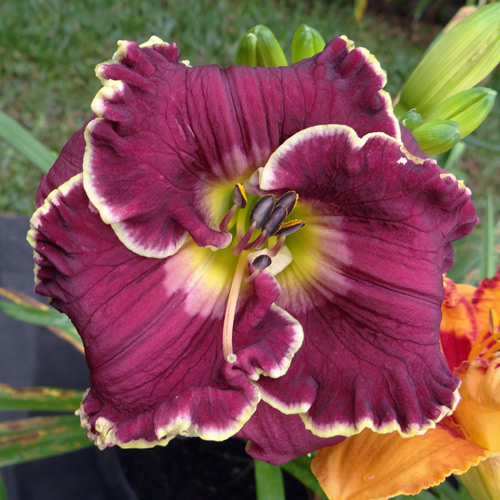
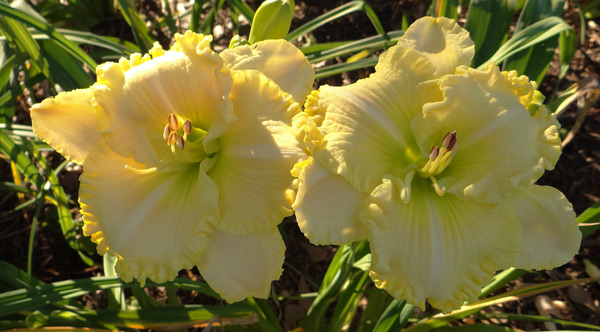
This is seedling 14-045. Like yesterday's seedling, 14-045 first bloomed last year so I can't say much about its performance yet.
|
| June 28th, 2015 - finishing the rust thread (day 7) |
Being a frugal person (my wife says 'cheap'), I have always been concerned with what seemed like the high cost of these fungicides. These concerns were based on the relatively high initial purchase cost. For example, the cost to purchase the five products in my spray program would be over $500.00 because they are not available in 'home use' package sizes.
I finally took the time to calculate the real cost of using these fungicides. It turned out to be more reasonable than I thought because the application rates are small making the products last for quite some time.
For the spray program I posted yesterday, here is my analysis of the cost per gallon:
- Systemic (alternating Cleary's, Bayleton, & Cabrio) $0.24 (average)
- Contact (Dithane) $0.22
- Triac 70 $0.69
The total cost per gallon comes to $1.15.
The bottom line for the average daylily grower if you don't have tons of daylilies and don't want to spend a lot of money is to go in with one or more other daylily growers and purchase the products together and then divide them up.
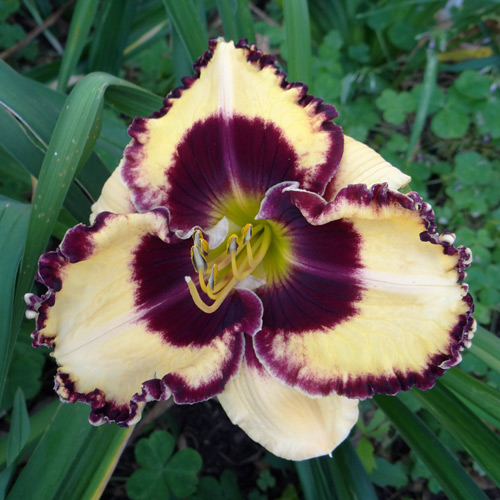
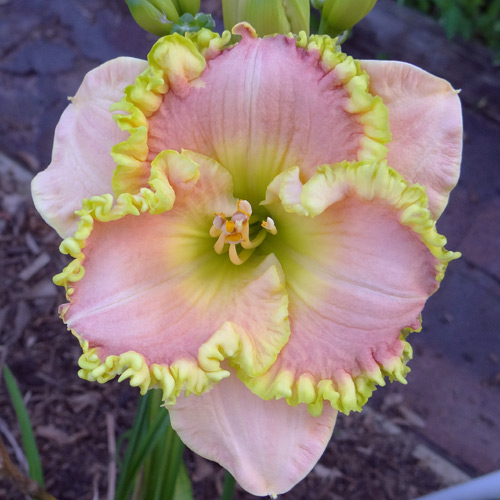
This is seedling 14-023. It first bloomed last year so I don't have much to report other than it has a pleasing bloom.
|
| June 27th, 2015 - continuing the rust thread (day 6) |
After doing the research for this series, I have decided I need to improve my rust spraying program. I plan to spray every 7-10 days using a mix of fungicides. I have always been concerned about mixing fungicides but web research doesn't show there to be any issues with mixing with one exception which I will avoid. If I see any other issues with mixing I'll have to make adjustments.
Each spraying will use a different systemic fungicide so that each one will only be used about once a month. To this I will add Dithane which is a contact fungicide. I can use Dithane every time I spray because it does not cause a resistance to build up. Lastly, I will include Triac 70 and being an oil, it should serve as a spreader-sticker. Triac 70's active ingredient is Clarified Hydrophobic Extract of Neem Oil which acts as a broad spectrum fungicide. It reportedly also has miticide and insecticide properties. Note that Triac should not be mixed with Chlorothalonil (Daconil). That's why I'm going to use Dithane.
I plan to start spraying BEFORE I see rust in the garden. In the past I have always waited until I began to see the rust before I started spraying. This gives the rust a head start. Now that I know that the systemics inhibit the rust from entering the spore production phase, I understand the reason for being proactive.
More in the next post.

While taking pictures in the seedling bed, something blue caught my eye. About 10 feet up in my fig tree was this group of Morning Glory blossoms. The color was so vivid I just had to take a picture.
In this area, Morning Glory vines are considered a weed by many. Once they get established, you can't get rid of them without a concerted group effort between neighbors. They tend to thrive in less manicured areas like behind garages, between fences, etc... and because they are vines they can travel for quite a distance before they begin to bloom.
Don't we all wish there was a daylily with this color? (smile)
|
| June 26th, 2015 - continuing the rust thread (day 5) |
Here are the six different fungicide groups that have shown to be useful against rust and some of the fungicides included in each:
- Code 1 (systemic) - Thiophanate-methyl (Cleary's 3336F)
- Code 3 (systemic) - Propiconazole (Banner Maxx, Honor Guard PPZ, Bayleton)
- Code 11 (systemic) - Pyraclostrobin (Compass O, Heritage, Cabrio)
- Code M3 (contact) - Mancozeb (Dithane 75DF)
- Code M5 (contact) - Chlorothalonil (Daconil 500ZN)
- Code NC (other) - Triac 70 and Double Nickel 55
You can find the latest FRAC code listing at this link. The FRAC code is in the right hand column.
FRAC code listing
I have used Bayleton and Cabrio for some time now. When properly alternated, they do a pretty good job of controlling rust. I have to confess that this year I somehow forgot that I needed to alternate and I used Cabrio weekly for about 6 straight weeks. It wasn't until I noticed that rust was getting the upper hand that I realized why. One application of Bayleton knocked the rust flat.
More in the next post.
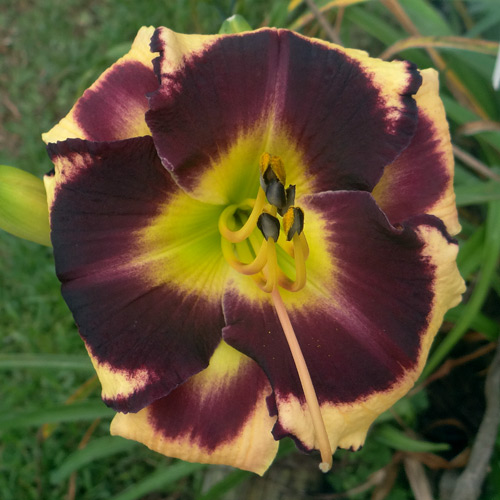
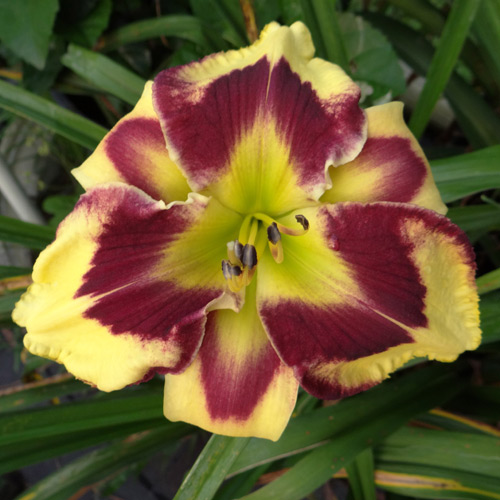
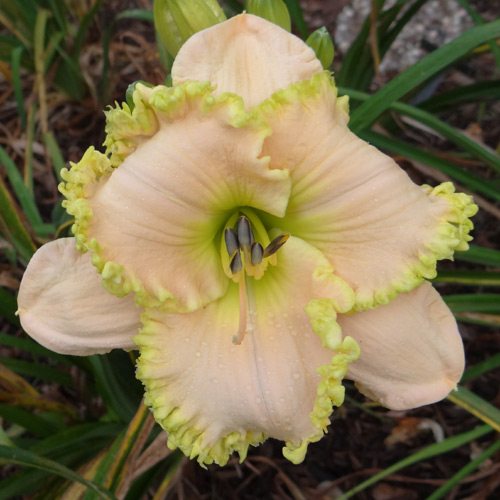
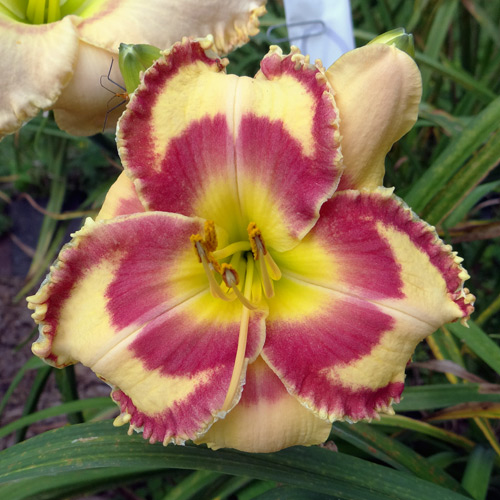
Seedling 15-009 is another that first bloomed this year. It has a nice bold eye but even more impressive is that it put up 3 scapes. As soon as one had finished blooming it sent up the next. Not bad for the first year the plant bloomed.
|
| June 25th, 2015 - continuing the rust thread (day 4) |
So how do we control rust if we cannot kill it? The answer is an effective fungicide spraying program. The fungicides don't kill the rust but they prevent the rust from forming spores and that keeps it from spreading (and also keeps the foliage looking good). There are some things to understand about fungicides when you go about developing your own spray program.
Fungicides have been placed in groups based on their mode of action by The Fungicide Resistance Action Committee. There are 6 groups identified by 'FRAC Codes' which have shown to be effective against daylily rust. Three are systemic, two are contact, and the third is other. FRAC Group tables can be found online which lists various fungicides in each of the different FRAC codes.
A common misconception about the systemic fungicides is that they do not travel throughout the plant in the traditional sense of the word systemic. Instead they just penetrate the leaf surface so their protective action lasts longer while the contact fungicides affects only what it comes in contact with on the leaf surface.
It is important to understand that the systemic fungicides while providing the best control, are very susceptible to resistance. That means that any fungicide from the same systemic group should not be used more than a couple of times in succession. This isn't as difficult as it sounds because there are three systemic groups and you can alternate back and forth between two of them (or using a fungicide from all 3 groups is even better).
The other two types (contact and 'other') typically do not cause a resistance buildup and so they can be used repeatedly without any concerns.
More in the next post.
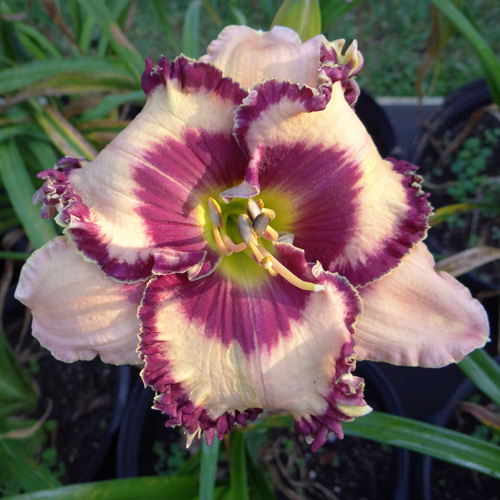
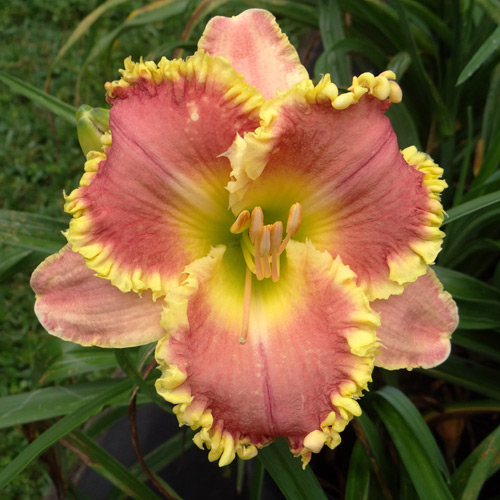
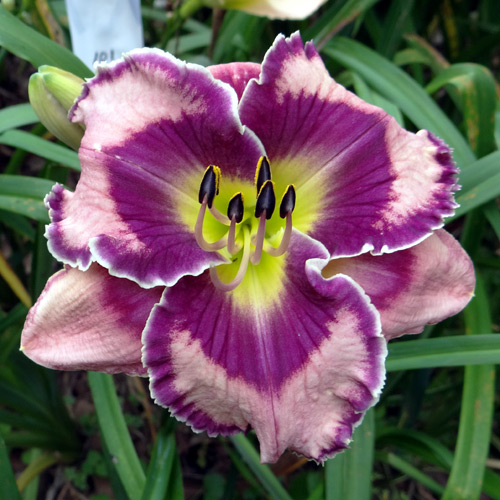
This is seedling 14-010. It comes from the cross (EDWARDIAN CHARM x HAPPY HALLOWEEN). I am pleased that this seedling seems to have picked up the best traits from both parents. It received the basic color, bloom size, scape height, and bud count from EDWARDIAN CHARM while inheriting the heavier substance and bolder eye and edge from HAPPY HALLOWEEN. While this picture was taken previously, today 14-010 had four blooms open on a rebloom scape.
|
| June 22nd, 2015 - continuing the rust thread (day 3) |
Here along the gulf coast I have two rust seasons - spring and fall. I seldom see rust during the winter unless we have an unusually mild spell. I guess it's usually too cool and the rust remains dormant. Likewise, I don't see much rust in the summer once the daytime temperatures regularly hit the 90's. If we go through at least a week of rain with milder temperatures, I may see some rust but once it gets hot again it dies off. I would say that rust is most active when the temperatures are in the 60's through the 80's.
One thing that promotes rust is wet foliage. It is said that rust gets worse when the foliage remains wet for at least 4 hours. The extremely wet spring here has made rust the worst I've seen in years. While rain and our high humidity makes for wet foliage, watering at night can make the problem even worse. Pre-dawn watering instead of evening watering is recommended so the foliage will dry fairly quickly. The problem with pre-dawn watering is that when we are in bloom season, I don't want the water to spoil the blooms. A drip irrigation system might be a good option.
I've also heard that it is important to remove infected foliage. My personal recommendation is that any active rust needs to be killed off before removing the infected foliage as live spores will only be further spread when the foliage is disturbed.
More in the next post.
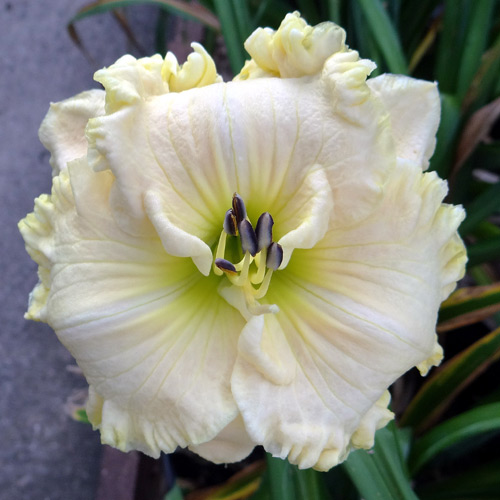
Seedling 13-089 is another that surprised me a bit when it first bloomed. The parents were all yellow but 13-089 turned out more of a creamy off-white color. The parentage is (Larry Grace x Spacecoast Gold Bonanza) X Lacy Dusk. Lacy dusk is probably the lightest of the parents but even that is a light yellow. It just goes to show that you never know what you'll get from a cross.
|
| June 21st, 2015 - continuing the rust thread (day 2) |
Being a fungus, rust spreads by producing spores which can be carried by the wind. That means that you probably cannot prevent a rust infection even by not introducing new plants to your garden.
In 2001 I was following the current wisdom and all newly purchased plants had all the outer leaves removed and the inner leaves severely cut back before planting. That was supposed to reduce the chances of introducing rust into your garden. While I still got rust, the biggest surprise was where it first showed up.
Every day I would walk around the bed with the named cultivars, closely checking for any signs of rust. So far so good, I thought. Then while inspecting some of my seedlings, the bed that was about to bloom for the first time, I noticed what appeared to be a browning of the foliage in one corner of the bed. Upon closer inspection I found rust. It had appeared in the upwind corner of the yard and in new seedlings from different crosses. Yes, the rust arrived on the wind.
More in the next post.
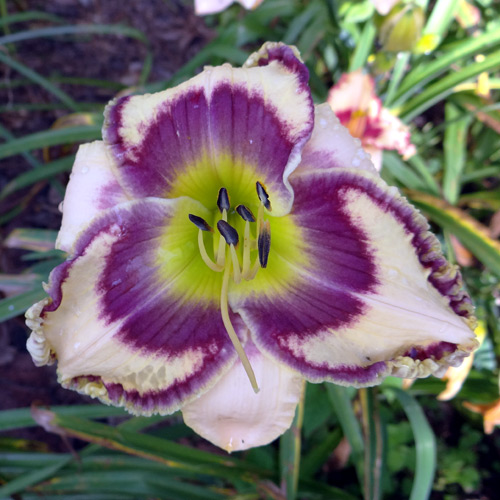
This is seedling 12-005. The parentage is PATHWAY TO PARADISE x SHEER EXCITEMENT. Frankly, I was a little surprised when I saw this seedling bloom for the first time. I had used both parents in other crosses without much success so to see something I liked come from a cross between them made me smile.
|
| June 20th, 2015 - beginning a series on rust |
Most people have heard the expression "the elephant in the room". While not a pleasant topic, I thought I would start a discussion about "the elephant in the daylily garden". So what is this elephant? It's daylily rust. I should preface anything written here by saying that this is not a scientific discussion but is based on my own observations here in my gulf coast garden and what I have read from others. If you live in a colder climate (zone 6 or colder), rust is probably not as much of a problem as it is here.
For those new to daylilies, they always used to be considered a carefree flower and they were for the most part. Then in the fall of 2000 daylily rust was first detected in the southern United States. I've heard that it arrived on some daylilies that were being grown in Costa Rica for one of the big box stores. It has since spread over a large part of the country.
It's said that rust itself doesn't kill daylilies but a severe case can cause stress and a subsequent reduction in the plant's overall health making it more susceptible to other pathogens (such as crown rot here in the south). Probably the biggest concern to most daylily growers is how rust can turn beautiful lush foliage into a ratty looking mess in a matter of a few short weeks.
At least so far, rust cannot actually be cured. It remains in the foliage even when there are no visible signs of the presence of the fungus. Because the fungus resides in the foliage, it does not winter over in colder climates. That's because the plants go dormant and all the foliage dies back. With no green foliage there's no place for the fungus to live. In milder climates the best we can do is control the rust.
I'll continue this thread in upcoming posts.
A couple of years ago I was reorganizing one of my potted daylily beds. After transplanting all the marked plants from the new seedling bed, I still had a couple of open pots. So I went back to the new seedling bed and selected a couple of the fattest fans I could find and planted them in the pots, knowing only that they hadn't been good enough to mark when they first bloomed.
Seedling 13-107 above is one of those fat fans that I selected and I have been pleasantly surprised. Its only fault is that the scapes are a little short which may be why I didn't mark it when it first bloomed.
|
| June 18th, 2015 |
The monsoon season continues... at least that's what it seems like this year. Tropical storm Bill hit the state hard causing more flooding. Fortunately, many parts of Houston escaped much of the serious rain including where I live. My 2-day rain total was only 3 inches.
All this rain continues to do wonderful things for the daylilies. While walking the beds this evening I noticed that more cultivars than usual are now sending up a 3rd set of scapes. That means bloom season will continue for a while yet. With the rain have come milder temperatures which helps keep the bloom colors from becoming too faded.
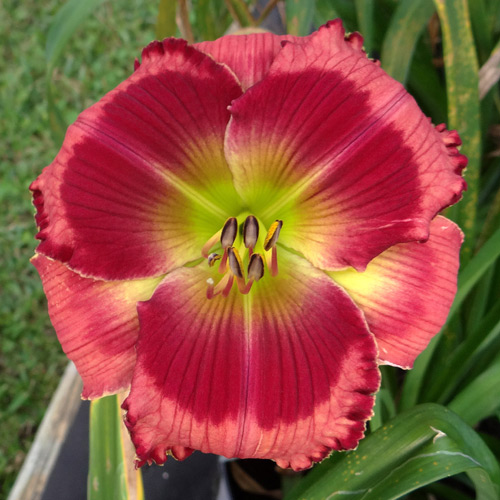
This is another of the red with darker red eye seedlings that I am evaluating. Seedling 13-004 comes from a cross between CALAMITY JANE x MARTIN BLONDEEL.
|
| June 13th, 2015 |
Showers today meant that I couldn't work much in the garden but it gave me a chance to sort through some more of the pictures I took in the garden this year. I had to delete quite a few because they were taken after it had rained. It rained a lot during the nighttimes so I had more wet bloom pictures than usual this year. Small water drops from a light mist can sometimes give a bloom character but in most cases the ones without water drops are much better.
Because I take multiple picures of the same seedlings throughout their bloom cycle I get to see the color changes as the temperatures get warmer. Lavender colors seem to be the most affected by warmer temperatures getting lighter as the temperatures increase. Pinks, especially the lighter pinks seem to be the second most affected color.
This is seedling 14-031. It is only a 5" bloom but the color is good and the white edge sets it off nicely.
|
| June 12th, 2015 |
The combination of a very wet spring and increased sun (I removed a couple of 60' pine trees) have provided some wonderful scapes this year. I'm seeing branching and bud counts like I haven't seen in years. This is especially true for the rebloom scapes. I have 5 and even 6-way branching on some of the rebloom scapes. And my lawn also looks much better too, now that it's not in the shade most of the day.
Green edges became the rage a few years back and I have to admit that I jumped on the bandwagon. It's not that the edges are completely green and the green seldom jumps out at you, but the green is definately there especially in the morning. Seedling 13-078 (above) probably has the greenest edge of any of my seedlings. You can see it on the fringes of the gold edge. Seedling 12-052 (below) is another with a green fringe around the yellow edges.
|
| June 11th, 2015 |
We have entered our normal summer pattern now. Morning temperatures are in the low to mid 70's with afternoon highs in the mid 90's. The hot temperatures mean the plants will transpire much more during the heat of the day. When this happens, the plant's roots can no longer take up enough water to keep the lush spring foliage green so the lower leaves are dying off to bring the plant back into balance with its water uptake ability. This is a normal process but it can leave the garden looking a bit ratty even with the continuing moderate bloom. Once this process is completed, I usually remove the brown leaves to make the garden look better.
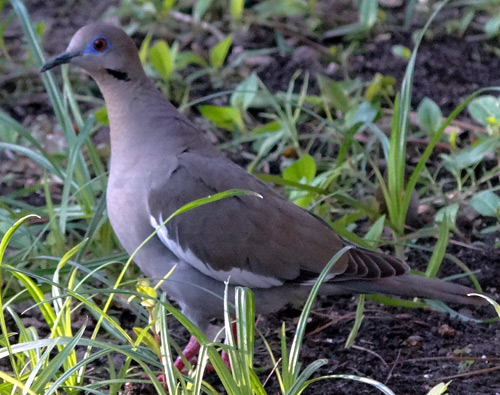
Here's a picture of one of my daily garden visitors. There is a fairly sizable population of these white wing doves in this neighborhood and their cooing can be heard every morning.
|
| June 7th, 2015 |
We're on the downside of bloom season now. Sure there are still be lots of pretty blooms to come but the best part of the show is over for another year. So what's a daylily fanatic to do?
For me, it's time to go through the many pictures I've taken over the past weeks. I use pictures to document how my seedlings performed, or at least how they bloomed and now have a folder full on my computer. It will take me some time to go through them all and cull out the bad shots. Eventually, I'll end up with two or three of each seedling.
If the seedling has a lot of 'good days' then I'll keep only good pictures. If however, the seedling has a lot of days when the blooms are less than stellar, I make sure I keep some of those less desirable photos just to remind me of the seedling's true performance. Of course, you probably won't see many of those bad pictures posted here (smile).
You have probably noticed that I prefer daylilies with eyes or fancy colored edges as that's mostly what I've been posting. That doesn't mean I don't like single color daylilies. Seedling 13-043 has put on a nice show this season. It has a nice round, flat form with a heavily ruffled edge. This shot was taken on June 2nd at about 7:30 am.
|
| June 6th, 2015 |
Every year I go through the same cycle during bloom season. When the first blooms appear I am disappointed with many of them. They just aren't as full and voluptuous as I remember and many don't open quite as well as I like. Then as the daily high and low temperatures increase, so does the quality of the blooms. They get larger, fuller, and open better than they did at the beginning of the season. But probably the best part is that the fancy edges are really brought out by the warm temperatures.
This is what I call the "now that's what I'm talking about!" part of bloom season (smile).
Once the daytime high temperatures get into the 90's however, the quality of the blooms begins to deteriorate somewhat. The petals start becoming narrower, the blooms aren't as large, and the colors are not as vivid. Nevertheless, they still put on a pretty good show. This is just the way it is to grow daylilies in my gulf coast climate.
This was the last of the 1st year seedlings that I marked this year. Seedling 15-105 was not the largest bloom nor did it have the widest petals but it does have good color and a nice double edge.
|
| June 5th, 2015 |
I was beginning to think it might rain all summer but it's now been 5 days since the last the last good rain. I actually turned on the sprinklers to the new seedling bed tonight. My raised beds drain really well and the temperatures have been in the low 90's. I don't want the new seedlings roots to dry out as that could set them back. Once they have a chance to push their roots down to at least 6" deep I probably won't baby them as much.
Tomorrow, I plan to water my potted daylilies. Even the 7-gal pots can get dry fairly quickly when the temperatures get up into the 90's especially if there are multiple fans in the pot.

This is another of the last seedlings to bloom in the 1st year bed. Seedling 15-104 has a nice full form, something that I prize in my seedlings.
|
| June 2nd, 2015 |
This year bloom season progressed a little slower than usual this year. I attribute this to the fact that most of May was cloudy with only the occasional peek of sunshine. My registered cultivar bed still has lots of blooms every day. Only the seedlings have slowed down somewhat.
The wet, cloudy weather seems to be over at least for the time being. Sunshine is forecast for the next week along with our first 90 degree days. Both sun and hot temperatures will speed up the blooming.
Here's another of the last seedlings to bloom in the 1st year bed. This is 15-101 which first bloomed on May 17th. This color combination is one of my favorites.
|
| June 1st, 2015 |
Another 1.5" of rain last evening. All this rain should make for more rebloom than usual. One of the keys to good rebloom is plenty of water and we sure have had that this year. Houston has had their 5th wettest May on record.
The rain came with a cool front, something that is not all that common here at this time of year. The cooler temperatures (69F) have given me an opportunity to pull some weeds this morning. Anyone want a garbage bag full of nut grass?
As usual, the last few seedlings to bloom in the 1st year bed have been a pleasant surprise. This is seedling 15-102. It first bloomed on May 19th with this picture
taken yesterday.
|
Previous Posts
Back to current posts
|